
RENT PAYMENT FLOW
Clear, Secure Rent Payments
Designed for tenants and owners. Set rent once, authorize on time, and receive instant settlement with full tracking.
FLOW STEPS
Rent Payment User Journey
From registration to receipts, every step is structured, secure, and tracked.
-
1
Tenant Registration
The tenant creates an account or logs in using a mobile number or email, then accesses the rent dashboard.
-
2
Property And Owner Setup
The tenant adds property details and the landlord payment info such as UPI ID, bank account, or wallet.
-
3
Monthly Rent Configuration
The rent amount and schedule are set according to the rental agreement, and monthly autopay will be enabled for automatic payment each month.
-
4
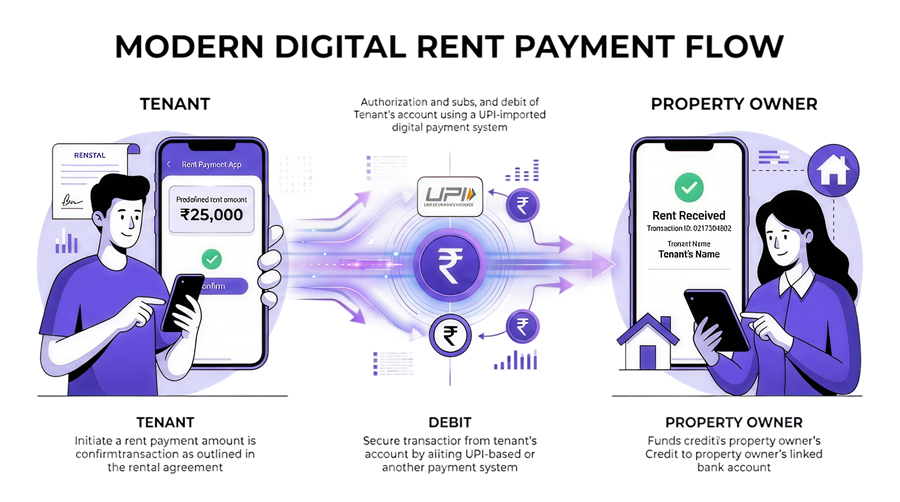
Rent Payment Initiation
On the due date, the tenant selects the property and confirms the rent amount to start payment.
-
5
Payment Method Selection
The tenant chooses a method such as UPI, bank transfer, or digital wallet.
-
6
Payment Authorization
The tenant is redirected to a secure gateway or UPI app to approve the payment using PIN or biometrics.
-
7
Transaction Processing
The system processes the transaction securely through the payment network.
-
8
Amount Debit
The rent amount is debited from the tenant bank account or selected payment method.
-
9
Owner Payment Credit
The payment is instantly credited to the owner bank account or digital wallet.
-
10
Payment Confirmation
Both tenant and landlord receive in-app, SMS, or email confirmation of a successful payment.
-
11
Digital Receipt Generation
A digital receipt or transaction record is generated for download and accounting.
-
12
Payment History Tracking
All rent transactions are stored to track history, due dates, and payment status.
NEXT STEP
Launch Rent Payments With TPIPAY
Get tenant onboarding, automated reminders, and reliable settlement in one flow.